Thursday 29 November 2012

Thursday 22 November 2012

Cat and sticker

Printed some Abi Makes stickers yesterday and couldnt resist sticking a few round the house. However the cat doesnt seem that keen on being used as a label display!

Tuesday 20 November 2012

Zip Course

After my first ever zip went ok and wasnt as scary as i thought i figured i should probably learn how to do them properly. So i signed up for the zips and buttons course at the Make Lounge.
The course was fab, we learnt normal zips and concealed zips and how to do buttonholes on a fully automated machine - none of which i had ever attempted. Theyre actually really simple, its just confidence and few insider tips and tricks that help you get started. Might even try to make some clothes now i have this new skill....
 
Regular zip front
 
Regular zip reverse
 
Concealed zip front, with concealed zip foot
 
Concealed zip reverse


Sunday 18 November 2012

Fingerprint Art continued....


My fingerprint art book has arrived and its even better than i hoped!! I thought it would be interactive but i didnt know it would be a workbook for me to fill in! Its like being back at school (which i loved, im such a geek!!)

These are some of my favourite pages :)

Giraffe print anyone?

Fingerprint monkeys!


Dia de los Meurtos skulls!


Friday 16 November 2012

Ombre Hearts Rainbow

Ive seen so many things on the internet where you use the free paint guides/paint chips you get in DIY shops to create some beautiful ombre effect art. So i thought it was high time i jumped on the band wagon too!


I love my little ombre heart rainbow, really simple but really pleasing on the eye (and free!)


Thursday 15 November 2012

Melted Snowman Bauble

Lovely BM can be a bit of a Scrooge when it comes to Christmas so i made this bauble for him!
Bah humbug!


It was super easy to make, i bought some clear baubles from The Range, ones where you can take the cap off. Then i made a carrot nose and some coal eyes and buttons from Fimo. Filled the bauble with some salt, popped in the fimo pieces and popped the cap back on
The cap isnt the most secure so i glued it back on with some super strong adhesive.
Dont you just love him!!


Tuesday 13 November 2012

My first ever zip :)

I certainly dont think im a good sewer, im a capable basic sewer but anything too complicated gets added to the 'maybe one day' list! But there are so may adorable little zip purse tutorials out there that i figured i have to give it a go.
So i followed this tutorial by Noodlehead, it was easy to follow so id recommend it. I messed up the zip ends though and sewed over them when doing the side seams (even though the tutorial clearly says not to!!) but i like the finished effect so im not at all put off by that.
Look out for more zip pouches on here as i think ive caught the bug!


Monday 12 November 2012

Día de los Muertos skull drawing

I love all the Dia de los Muertos skulls around at this time of year so i thought id have a go at drawing my own. It was great fun to draw and i think itd look good repeated as wrapping paper. Might have to see if thats possible to do....

Saturday 10 November 2012

Teacup Birdfeeder

I love the tea cup bird feeders that are about at the moment so i thought id have a go at making my own. I got my mum to search her cupboards and the local charity shops for some nice tea cups (great work Muma!) and i picked a few i liked.
(Sorry i forgot to take a picture of just the tea cups before glueing them, so these have the bails already attached)

 
First off I glued the cups to the saucers with strong adhesive and then glued the bails (i bought mine from ebay) to the cups. These are going to go outside so make sure your glue is permanent and suitable for outdoor use


(These are the bails i used)

Once everything was dry i fixed a chain to each of the bails and then joined them together at the top with a hook
I bought the chain from hobby craft and the hook from B&Q
Theyre ready to use like that, just fill them with bird seed, but i wanted to add bird cake to the teacup part.
I used this receipe from the RSPB and packed it in the tea cup
http://www.rspb.org.uk/youth/makeanddo/activities/birdcake.aspx
Heres one hanging in my mums backgarden, hopefully the bird (and not the squirrels!) will like it as much as i do :)


Friday 9 November 2012

PVA Glue Screen Printing

Ive seen DIY screen printing a few times on Pinterest so i thought id give it a go myself. I followed this tutorial at My Calico Skies

Equipment
Tights (for your screen)
Tapestry hoop
PVA glue (Modge Podge to the North American folks)
Fabric pen
Fabric paint
Card or plastic (to act as your squeege)
Something to print onto
First off make your screen. Stretch your tights across your tapesty hoop. Make it as tight as you can, springiness = movement which is not ideal in screen printing so the tauter the better.
Also try and a use as big a screen as you can in comparison to your design, it makes it much easier to print if you have space around the design.


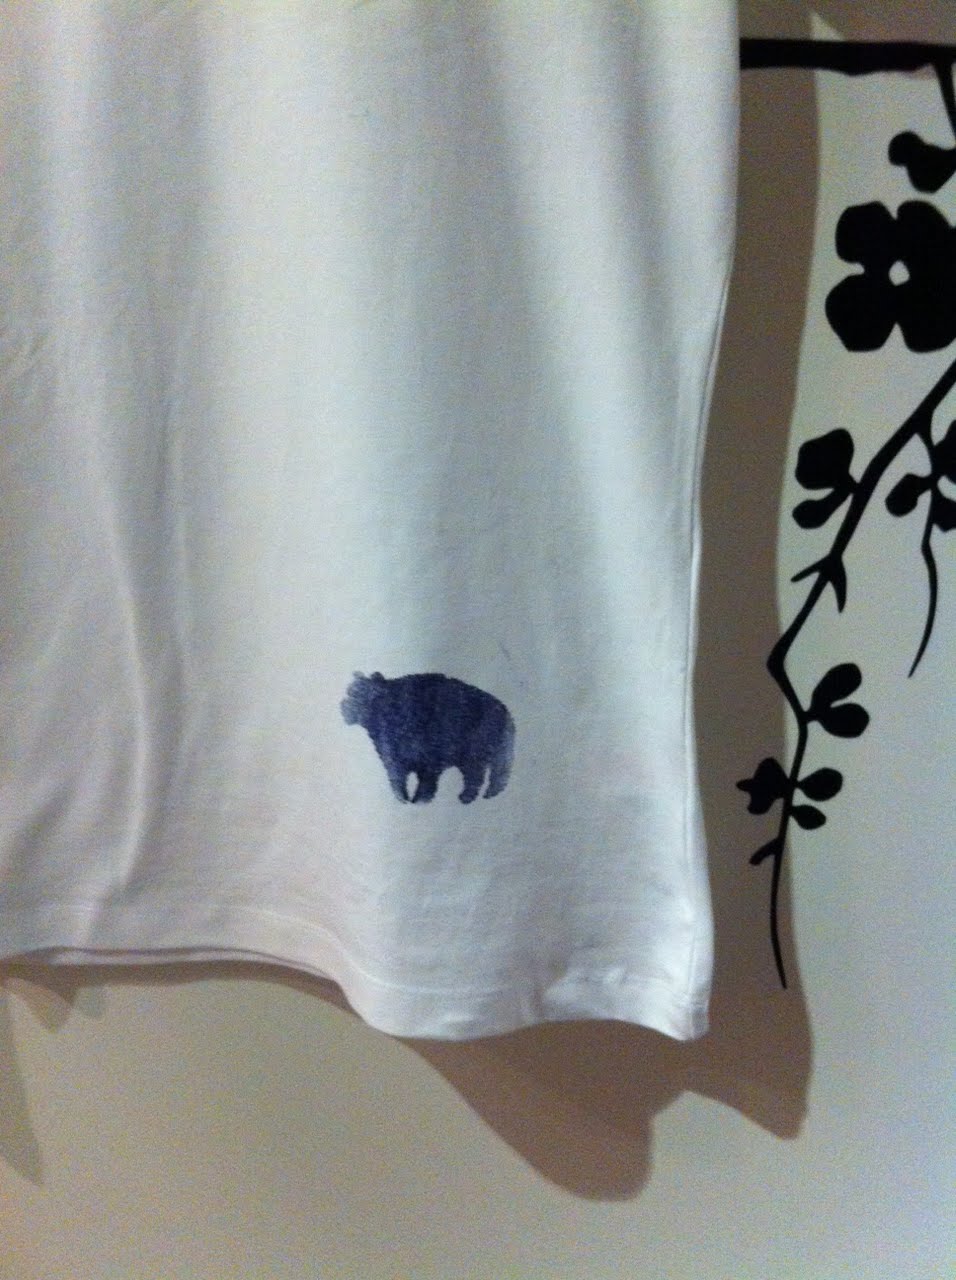
Draw your shape on the screen with a fabric pen, dont use anything that may run into your design when you actually print it. My design is a bear (if you can see it!)
Then paint around your design with PVA glue - only the uncovered bits will print so try not to get any glue on your design, and leave it to dry. I gave mine 2 coats i the end as i could see a few tiny holes around the design


Once the screen is dry place it on whatever you are printing, im using a plain white tshirt. Place it flat side down so the screen is flush with the tshirt


Splodge on some paint above the design. This is where is useful to use a much bigger frame for your design, gives you more space to do the actual printing.


Then scrape the paint all over the design, try and be as firm as possible to make sure you squeeze all the paint through the tights. I used a bit of scrap plastic as my scraper but cardboard would do, anything firm with a flat edge basically.
Make sure you scrape paint over the whole design and you can go over it more than once if you want to make sure, just be careful the screen hasnt moved if you do.


Then peel of your screen and admire :)
You can see from mine that i used more pressure in the middle than the edges as not as much paint was squeezed through there, but i don't mind, i like inadvertent the mini ombre effect!
Let the paint dry and then follow the manufacturers instructions for fixing the paint to your fabric, and youre done.


Thursday 8 November 2012

Fingerprint art


I just fell in love with this book when i saw it, ive already ordered it but i couldnt resist having a go at some of the creatures in this cute video :)


Love the mouse in the middle especially!

Wednesday 7 November 2012

Leather and tube bead bangles


I made some little bangles recently. Theyre just leather with a long plastic tube bead threaded onto them. I glued the ends of the leather together and pushed the join inside the bead - and voila! I think theyre pretty cute, especially in a few different colours. Not sure how long the glued join will last, might need to figure out something more permanent but its a good start :)

Tuesday 6 November 2012

Mushroon Jam Jars

I saw these adorable little mushroom jam jars on Pinterest and could resist making my own, especially since i have some red spray paint ready to go

First off i sprayed the lids with a few coats of red, propped up on cut down toilet roll tubes so i could do the sides. I let them dry over night.

Then i drew little white spots on them with a white marker pen and they were finished :)
So easy and I think theyre really cute, possibly going to give them as Christmas presents with little treats inside...


Monday 5 November 2012

Melted Hama (Perler) bead flowers

I wanted to try and make some cute little flower charms like these i saw at Craft Gawker. But i didnt fancy melting proper plastic in my oven so i tried it with Hama (Perler) beads. I just placed them in flower shapes on greased tinfoil (make sure its greased or you'll have the same problem i did!) and popped them in the oven at 150C


Im not sure i like the finished effect, too thin basically, but im glad i tried it out. Might try stacking them up next time, to get them thicker...

Sunday 4 November 2012

George Foreman Grill Paninis


I love paninis but i dont love the idea of buying yet another kitchen gadget to make them. Then, when i was close to giving in and buying a panini maker a little light bulb pinged on above my head! I bought lovely BM a George Foreman grill as a house warming present many moons ago - would that work? So i gave it a go and it doesnt just work it makes brilliant paninis! So i just had to share

So these are all my ingredients, i made a mozzarella, parma ham and sunblush tomato panini with garlic herb butter

First off i spread my panini halves with the garlic herb butter. I use this recipe from Annie's Eats. (My butter was frozen which is why its in little lumps!)

Then i toast the panini halves to get all the garlic and herbs into the bread

Take them off the grill and add the filling

 
Pop them back on the grill, squish them down flat with the lid and let them grill away
Once theyre toasted to your liking, cut them in half and scoff them down :)


Enjoy! Lovely BM and I certainly did :)


Friday 2 November 2012

Brass square necklace pendant


I love simple jewellery and when i saw these square frames on ebay i thought they might make good necklace charms. I was planning on adding a few to make a longer pendant but when i added the first one i liked it so much that i didnt bother adding any more!


I think it'll look great over a tshirt or with a dress, hopefully it'll be versatile enough for both :)