Showing posts with label instructions. Show all posts

Friday, 17 February 2012

Applique Star Tshirt - Tutorial

Its t-shirt week apparently this week! Another t-shirt tutorial!

Ages and ages ago the Telegraph newspaper was giving away free Cath Kitson booklets full of cute little makes and there was a beautiful one for an applique t-shirt which I wanted to try
 
What you need
Plain t-shirt
Wonderweb sheets or any other iron on adhesive (the kind that’s adhesive on both sides as you want it to stick to your shape and your t-shirt)
Fabric scraps
Applique shape template, I used a star but it can be anything you want.
Thread
Sewing machine
Iron
Scissors

So I bought a plain white t-shirt, (Asda, Tesco and Primark are good places to try for cheap ones) and used some left over fabric scraps.
My favourite shape is a 5 pointed star so I cut one out in card to use as my template.

Iron the fabric scraps onto to the Wonderweb, John Lewis or Hobby craft sell this. Place an old tea towel or something between the iron and the fabric/Wonderweb to avoid getting your iron sticky.
 Cut out your fabric scrap, now with Wonderweb attached
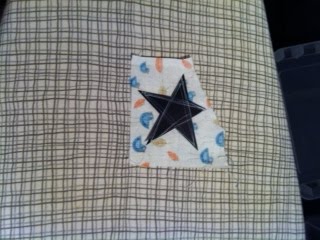
Then, using your shape template, cut out your fabric shape
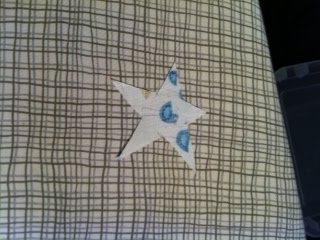
Now lay out the shapes in the pattern you want on your t-shirt and iron them into place
Then, using your sewing machine on a zigzag stitch, sew around the edges of the fabric shapes. 
Theres a fab tutorial here, although they recommends using the button hole stitch. I don’t think that works very well on stretchy fabric so I use zigzag and just try out the size and length on bit of scrap fabric first. 
You could also hand stitch these on if you don’t have a sewing machine.

I used white thread on my applique as I wanted quite a subtle outline so it isn’t very clear in the photo, sorry, but you can use whatever colour you want on yours.
  
(see the little hedgehog that has appeared on mine, I accidentally snipped my t-shirt so I just patched the hole with him!)

I'm actually wearing my t-shirt today as I blog this!


Wednesday, 15 February 2012

Screen Print Cushion Tutorial

I blogged about this tutorial for screen printing without a screen over at The Creativity Exchange before and lovely BM and i needed some new cushion covers so i had a go at making them this weekend

I just used some basic cream drill cotton i bought from ebay. Id recommend a good thick fabric for cushions, like a drill, as it needs to be quite durable. I measured around my cushion, and cut my fabric to the same width and 2.5 times the length, with an additional 5-10cm seam allowance.

Then i laid out the pattern i wanted in tape in the centre of my fabric, trying to make it as symmetrical as possible. This was the most difficult part, i love the geometric shapes and they only work if theyre exact so there was a lot of measuring and calculating involved, but i quite enjoyed it really. I used frog tape, just got it from B&Q, as i think it's much better for stopping paint bleeding under the tape.

I bought some screen print paint from my local art shop. Its important the you use paint that doesnt bleed or you wont get the crisp straight line that looks so good so I tested my paint on a bit of scrap fabric first to make doubly sure.
Then i just painted in the areas i wanted, i did 2 coats to make sure i got even coverage, letting it dry fully in between coats.

Then the fun bit is pulling off the tape and seeing what youve created! I loved how mine turned out and the colour is nice and opaque which is what i wanted.


I ironed the cushion covers to set the paint, but check your paint to see what you need to do to set it. Then i made then up into cushions following the instructions on The Creativity Exchange's tutorial.


There's already in use on our sofa and I'm loving them. I'm not sure how washable they are so i just need to try and keep Marley cat and his giant muddy paws away from them!

Friday, 10 February 2012