Wednesday 29 February 2012

Cami bands - continued...

So i posted my first attempt at a cami band here a while ago and ive made a new modified version
Its still based on the fab tutorial over at makeit-loveit, but ive modified it so its more suitable for a non pregnant lady!
So i made a cami band following the tutorial at makeit-loveit. I made it much longer and bit tighter than my previous attempt and used jersey instead of shiny lycra. This was all in the hope it would stay put more and ride up less.

I used some khaki jersey that i bought from ebay.

Then i created some darts around the top and pinned them in place. These are just little folds or pleats in the fabric that just decrease the circumference of the band at the top where your waist is.
  
Lots of smaller pleats are better than a few large ones and try and space them evenly.
I only needed 4 on this cami band as i made it deliberately tight across my hips but another one i made needed 10.

I then stitched lengthways down the dart/pleat, about a third of the way down the band and repeated that for the rest of them


And voila - a tailored cami band :) i call it cami band 2.0

I wore it today and it was very comfortable, definitely and improvement on the original version.

Tuesday 28 February 2012

Waterproof rug tutorial (using a shower curtain)

I've made myself a few waterproof rugs like this over the years so i thought id make a new one and share it here :)
Basically its just a shower curtain stitched to the bag of a rug - yes thats it! Why pay a fortune when you can buy a rug and shower curtain and make your own

So i just bought a fleece rug from Range for £4 and a shower curtain from Sainsburys for £4. I cut the shower curtain so it was about 5cm larger than the rug and pinned them together with the right sides together. I then machine sewed three sides entirely and then on the forth side i left a 15cm opening. I trimmed any excess off and turned everything out of the gap id left. I then hand sewed the gap shut. You could top stitch all the way round if you dont want to handstitch the opening.


I now have a lovely turquoise backed rug thats perfect for sitting on damp grass (something we have a lot of around here!)
It isnt totally waterproof as the stitch holes do let a bit of moisture through but its usually not a problem. If you want to make it totally waterproof you can paint on some of the sealant you use to seal tents

Thursday 23 February 2012

Ninja matryoshka Tutorial

I love russian dolls or matryoshkas, i always have. I think ive had one set or another my whole life. Theres some amazingly designed ones out there and i thought id customise my own set as a little troop of ninjas!

I bought the plain blanks from ebay and just used some high gloss enamel black spray paint to cover them. I used Plasti-kote from Hobbycraft but i think if i make them again i'll paint them by hand using the little tins of paint you get for model airplanes etc. The spraying just felt very wasteful as i used the whole can on this one project.


The one they were painted i covered them in masking tape and then used a scalpel to cut out the eye holes and sprayed the holes with red spray paint this time.


Again i think id paint them by hand next time as some of the red bled under the masking tape. But overall im really happy how they turned out. Now my home is projected by ninjas!

Wednesday 22 February 2012

Packaging Makes - ideas

I sell packaging in my etsy shop and ive been working on some ideas and makes relating to the packaging.
Some of the ones i found that i love are below


Paper bag lanterns


Stiched glassine bags


Printed paper bags

I might even make my own free printables like these


Friday 17 February 2012

Applique Star Tshirt - Tutorial

Its t-shirt week apparently this week! Another t-shirt tutorial!

Ages and ages ago the Telegraph newspaper was giving away free Cath Kitson booklets full of cute little makes and there was a beautiful one for an applique t-shirt which I wanted to try
 
What you need
Plain t-shirt
Wonderweb sheets or any other iron on adhesive (the kind that’s adhesive on both sides as you want it to stick to your shape and your t-shirt)
Fabric scraps
Applique shape template, I used a star but it can be anything you want.
Thread
Sewing machine
Iron
Scissors

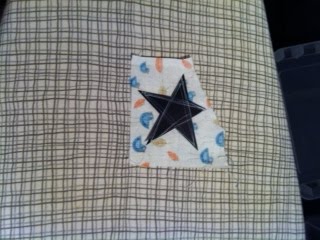
So I bought a plain white t-shirt, (Asda, Tesco and Primark are good places to try for cheap ones) and used some left over fabric scraps.
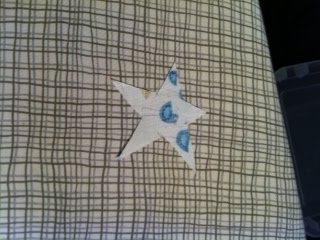
My favourite shape is a 5 pointed star so I cut one out in card to use as my template.

Iron the fabric scraps onto to the Wonderweb, John Lewis or Hobby craft sell this. Place an old tea towel or something between the iron and the fabric/Wonderweb to avoid getting your iron sticky.
 Cut out your fabric scrap, now with Wonderweb attached
Then, using your shape template, cut out your fabric shape
Now lay out the shapes in the pattern you want on your t-shirt and iron them into place
Then, using your sewing machine on a zigzag stitch, sew around the edges of the fabric shapes. 
Theres a fab tutorial here, although they recommends using the button hole stitch. I don’t think that works very well on stretchy fabric so I use zigzag and just try out the size and length on bit of scrap fabric first. 
You could also hand stitch these on if you don’t have a sewing machine.

I used white thread on my applique as I wanted quite a subtle outline so it isn’t very clear in the photo, sorry, but you can use whatever colour you want on yours.
  
(see the little hedgehog that has appeared on mine, I accidentally snipped my t-shirt so I just patched the hole with him!)

I'm actually wearing my t-shirt today as I blog this!


Thursday 16 February 2012

Robot Tshirt Printable

I feel in love with this little robot printable over at creature comforts so i had a go at making my own one last night. I messed up the iron on transfer a bit, me and irons are never the best of friends! But i still think hes dead cute, and its the little washers as wheels that just make the whole thing. He reminds me a bit of Wall.e!


Wednesday 15 February 2012

Screen Print Cushion Tutorial

I blogged about this tutorial for screen printing without a screen over at The Creativity Exchange before and lovely BM and i needed some new cushion covers so i had a go at making them this weekend

I just used some basic cream drill cotton i bought from ebay. Id recommend a good thick fabric for cushions, like a drill, as it needs to be quite durable. I measured around my cushion, and cut my fabric to the same width and 2.5 times the length, with an additional 5-10cm seam allowance.

Then i laid out the pattern i wanted in tape in the centre of my fabric, trying to make it as symmetrical as possible. This was the most difficult part, i love the geometric shapes and they only work if theyre exact so there was a lot of measuring and calculating involved, but i quite enjoyed it really. I used frog tape, just got it from B&Q, as i think it's much better for stopping paint bleeding under the tape.

I bought some screen print paint from my local art shop. Its important the you use paint that doesnt bleed or you wont get the crisp straight line that looks so good so I tested my paint on a bit of scrap fabric first to make doubly sure.
Then i just painted in the areas i wanted, i did 2 coats to make sure i got even coverage, letting it dry fully in between coats.

Then the fun bit is pulling off the tape and seeing what youve created! I loved how mine turned out and the colour is nice and opaque which is what i wanted.


I ironed the cushion covers to set the paint, but check your paint to see what you need to do to set it. Then i made then up into cushions following the instructions on The Creativity Exchange's tutorial.


There's already in use on our sofa and I'm loving them. I'm not sure how washable they are so i just need to try and keep Marley cat and his giant muddy paws away from them!

Tuesday 14 February 2012

Hand warmers


As its been so ridiculously cold here in the UK i thought id give V & Co's rice hand warmer tutorial a go. They were so easy to make and its a brilliant stash buster as they can be whatever size you want according to what fabric scraps you have left. I used them this morning and they were fab. They'd be great if you have any aches and pains as well or use them to warm up your bed instead of a hot water bottle! I think i might add some lavendar or thyme to them next time so they smell good aswell.

Monday 13 February 2012

Eye love you card

Lovely BM and I dont do Valentines day but we do try and be nice and treat each other throughout the year. Ive been making lots of pop up cards and moving cards recently, i'll posts some pictures when im done, so i thought id use my new found skill and make him a little card. Its inspired a bit by Indiana Jones, but even BM had to have that link explained to him so maybe its only me that remembers that bit!
Happy non Valentine's specific declaration of love day xx


Saturday 11 February 2012

Friday 10 February 2012

Wednesday 8 February 2012

Pinterest


I love Pinterest, i only found it last month and i think its just so handy, one single place for pictures of all the stuff i find. No more saved links or saved pictures or photos on my phone, its just all there in one place - heaven! I put loads of the stuff i find that i love, or want to make, or an inspired by on my pinterest board here. So check it out if you've got a sec, try and guess what im going to try and make next!

Tuesday 7 February 2012

Leather purse course


Ive booked myself on a course at the make lounge :) my brother bought me voucher for christmas so i put it towards the leather purse course. Ive always wanted to learn about leather work so im hoping this will be a good introduction. I'll try and take some piccies during the course and post them.

Monday 6 February 2012

Pebble drawing


Finally got round to making a bit of pebble art and i love it! As a bit of a compulsive doodler of very similar patterns i found it quite blissful drawing on the cool hard stone with a white marker. This large grey stone has travelled with me to four different homes now and ive never really known why i love it (it has no use, not even as a door stop, it just rolls away!) but i always have and now i think i love the decorated version even more. Just wish i lived by the sea so i could find more stones and pebbles to try this out on!

FYI this is the pen i used, a Posca Round Tip Ultra Fine in White, which i bought from hobbycraft, although im sure any finetip white pen would work fine.


Sunday 5 February 2012

Chocolate brownie pancakes


I saw these chocolate brownie pancakes by skinny taste on pinterest and knew i just had to make them! They dont look as appealing in my photo i know, they even look a bit burnt which they definitely werent, but thats just my terrible photo, they were actually pretty tasty. I think the high percentage of cocoa and the spelt flour did make them a bit heavier than regular pancakes but i still liked them. They would have work well with ice cream as well... maybe thats this mornings breakfast idea sorted!

Saturday 4 February 2012

Glazed glitter letter tutorial


Fab, easy tutorial for a glazed glitter letter over at iheart2stamp. I even have some diamond glaze left over from a previous make so i think i'll be trying this soon!
See my attempt here

Friday 3 February 2012

Makes i love this week

Great tutorial for a ruffle heart tshirt over at makeit-loveit its for a girls tshirt dress but you could definitely use the same concept on an adult tshirt


Love this picture frame chalkboard from iheartorganizing

Fab enamel painted vases at stayathomeartist


Brilliant embroidery hoop storage bags from craftzine

Love this handmade bag over at  how about orange, might use an old wool coat ive got to make one if these...