Lovely BM and i have received lots of 'congratulations on your engagement' bottles of bubbly recently and i always try to keep and recycle the gift bags they come in. So i thought why couldnt you also make wine bottle gifts bags from fabric to make them truly recyclable! I think the hessian ones are fab but the stripey ones are my fave, its a great way to use up your stash too
Showing posts with label fabric. Show all posts
Friday, 21 February 2014
Wednesday, 18 September 2013
Picture Wall Art
These are the other items on the picture wall which i made before i started blogging.

Fabric circles appliqued to some white cotton and tiny hearts punched from a map of our local area

Cute wrapping paper i found in Sydney Australia and a gorgeous silk painting of a boat, a card from many birthdays ago

A beautiful piece of calligraphy given to me by my Aunt, again many years ago and a felt heart i made for lovely BM when we first moved in together
Fabric circles appliqued to some white cotton and tiny hearts punched from a map of our local area
Cute wrapping paper i found in Sydney Australia and a gorgeous silk painting of a boat, a card from many birthdays ago
A beautiful piece of calligraphy given to me by my Aunt, again many years ago and a felt heart i made for lovely BM when we first moved in together
Labels:
applique,
art,
boat,
calligraphy,
fabric,
felt,
gallery,
heart,
map,
paint,
paper,
punch,
sewing,
silk,
wall,
wrapping paper
Friday, 19 April 2013
Lovely things I found in Ikea!
You never just buy whats on your list in Ikea, you always find
something else you ‘need’!
Gorgeous washi tape
Lovely (cheap) stripey fabric
Fabulous paper decorations
All I went in for was a lamp….
Saturday, 2 March 2013
Fabric purchases!
I can never resist a look round local fabric shops when im on holiday and my recent trip was no different!
I bought a lovely selection of new fabric, i especially love the foxes (look at the little sleeping fox - too cute!!)
Monday, 2 July 2012
Cataloguing my fabric
I keep all my fabric in a massive really useful box to keep it all tidy and because im a bit short on space.
But it means that i cant always see or even remember what fabric ive got. I'd always check before buying new fabric so i didnt duplicate (short on space remember!) but i sometimes think it would be nice to be inspired by my fabrics so i decided to do a photo catalogue of it all.
I just took photos of each fabric and then saved them on my computer. That would probably be enough as i'm always on my computer but i thought a print out to store with the fabric as well would be good.
Luckily windows has a great print pictures function which allows you to print lots of photos together. Before i knew this i used to copy and paste everything into a word document!
So i just popped my sheets on the top of my fabric box so i can easily look through and get inspired!
But it means that i cant always see or even remember what fabric ive got. I'd always check before buying new fabric so i didnt duplicate (short on space remember!) but i sometimes think it would be nice to be inspired by my fabrics so i decided to do a photo catalogue of it all.
I just took photos of each fabric and then saved them on my computer. That would probably be enough as i'm always on my computer but i thought a print out to store with the fabric as well would be good.
Luckily windows has a great print pictures function which allows you to print lots of photos together. Before i knew this i used to copy and paste everything into a word document!
So open windows explorer and select the all photos you want to print
Once theyre all selected right click your mouse and select print
This will open Windows photo viewer
Select 'contact sheet (35)' and then hit print
Contact sheet prints your photos 35 to a page so theyre pretty small, you can choose different layout if you want them bigger
Sunday, 3 June 2012
Print on fabric Update
So, as ive been posting about here, here and here, ive been trying to print on fabric using my home printer. The final issue i've been having has been fixing the ink. Heat didnt work so now i've tried pre-treating it instead.

50/50 fabric softener and water, top piece unironed, bottom piece ironed
I used bog standard fabric softener to pre-treat my fabric at 2 concentrations, neat and 50/50 with water. I just dunked my fabric in the fabric softener so it was all coated and then left it to dry. I printed directly onto the dried fabric and then washed the fabric (i used cold water in this test) to see if the ink stayed.
And i'm very pleased to report that it did :)
Both concentrations worked, i treated 2 bits of fabric for each concentration and ironed one aswell after i had printed on it, but that didnt seem to make any difference, in fact it may have been detrimental.
50/50 fabric softener and water, top piece unironed, bottom piece ironed
Neat fabric softener, top piece ironed, bottom piece unironed
The neat fabric softener made the fabric a bit crunchy after it had dried, it was fine once it had been washed though. But, as there doesnt seen to be a difference, i'll use the 50/50 mix in the future.
I think i need to check how well the ink stays after washing with warm water and soap, possibly even through the washing machine aswell, but im really happy with the results!
Wednesday, 23 May 2012
Print my own fabric continued....
So my first attempts at printing fabric are here and here.
The second attempt was successful but had some issues, mainly a dirty roller and an incomplete pattern. I fixed those and this is my new and improved printed fabric :)

Now the third issue was more difficult, how to make the ink permanent... So i thought i would try heat as my first option. I ironed one piece and left one un-ironed to see if there was any improvement in how permanent the ink was.
This is the before (ironed piece is on the right)

This is the after (ironed piece is on the right)

There wasnt really any difference, both inks washed off very easily in just cold water and no soap so definitely not permanent...
So a different solution needs to be found
I've had a look on t'internet and there's 3 options really
1. Use permanent ink - im not a fan of this as its expensive and id be using the ink for my regular printing as well, which would be a waste
2. Use some kind of fixative spray once its printed. Again not a fan of this, it's usually some kind of resin which makes the fabric a bit hard and crunchy. It would be fine for paper but isnt going to work on fabric.
3. Treat the fabric with a fixative solution before printing. There's a few different types of this available but i found a few websites that recommend trying neat (or 50/50 with water) fabric softener. I already have this in my cupboard so im going to give that a try next. If that doesnt work then i might look at some of the commercial fixatives
I'll keep you posted!
The second attempt was successful but had some issues, mainly a dirty roller and an incomplete pattern. I fixed those and this is my new and improved printed fabric :)
Now the third issue was more difficult, how to make the ink permanent... So i thought i would try heat as my first option. I ironed one piece and left one un-ironed to see if there was any improvement in how permanent the ink was.
This is the before (ironed piece is on the right)
This is the after (ironed piece is on the right)
There wasnt really any difference, both inks washed off very easily in just cold water and no soap so definitely not permanent...
So a different solution needs to be found
I've had a look on t'internet and there's 3 options really
1. Use permanent ink - im not a fan of this as its expensive and id be using the ink for my regular printing as well, which would be a waste
2. Use some kind of fixative spray once its printed. Again not a fan of this, it's usually some kind of resin which makes the fabric a bit hard and crunchy. It would be fine for paper but isnt going to work on fabric.
3. Treat the fabric with a fixative solution before printing. There's a few different types of this available but i found a few websites that recommend trying neat (or 50/50 with water) fabric softener. I already have this in my cupboard so im going to give that a try next. If that doesnt work then i might look at some of the commercial fixatives
I'll keep you posted!
Sunday, 13 May 2012
Print my own fabric
I posted about how to print on fabric before (original idea is from Creativity Exchange) and, because i was a bit skeptical whether it would work, i didnt really think about how to utilise it. I've also been searching for some better neutral (ie not cats or flowers a or cupcakes etc) patterned fabrics recently (can you see where this is going...). I see so many gorgeous fabrics on people's blogs but the majority are from the US so its not really practical to buy them. Ive found a few good online stores, and Ebay is of course an excellent source of most stuff, but i do like touching the fabric before i buy it. Which got me thinking 'is it possible to make my own?'
So I designed a basic flying bird pattern just using the shapes available in Microsoft word to try out. I cut out an A4 sheet of freezer paper, cut my fabric to match and then ironed them together.
Then I put the fabric through my inkjet printer.
For a first proper attempt i think it worked well. Theres 3 issues though. Firstly ive no idea why i didnt make my pattern a whole A4 page, i must have been interupted when i was doing it, i also need to remove the margins. Secondly there's some nasty black smudges at the top. My printer is pretty old so im hoping its nothing a good clean of the rollers wont fix. But third, and most crucial, the printer ink isnt waterproof as far as i can tell. I know you can buy waterproof printer ink but its expensive and, as i use my printer for normal printing too i'm not keen on swapping to it. I could potentially buy a separate printer but i'm not keen on spending money on this idea until im more confident with it. So further planning is required to get this to work...
Latest update here
Thursday, 19 April 2012
Print on fabric
Now i never thought this would work if im honest! When i saw this post at The Creativity Exchange my first though was that would be amazing... if it works! But it did! In fact i was so dubious that i hadn't even planned anything to print onto the fabric. I just used this wire cross section diagram i had pinned from on Present and Correct earlier that day. But it worked brilliantly, my printer took the fabric fine and the quality if the print is excellent. Now i just have to think of some proper ideas on how to utilise it!
Update here
Another update here
Thursday, 5 April 2012
Fabric and wire bag closures
Make these simple wire fasteners from your left over fabric scraps, by scissor variations
Buy these bags at my etsy shop
What you need:
Garden wire
Fabric
Glue
Scissors
Pinking shears (optional)
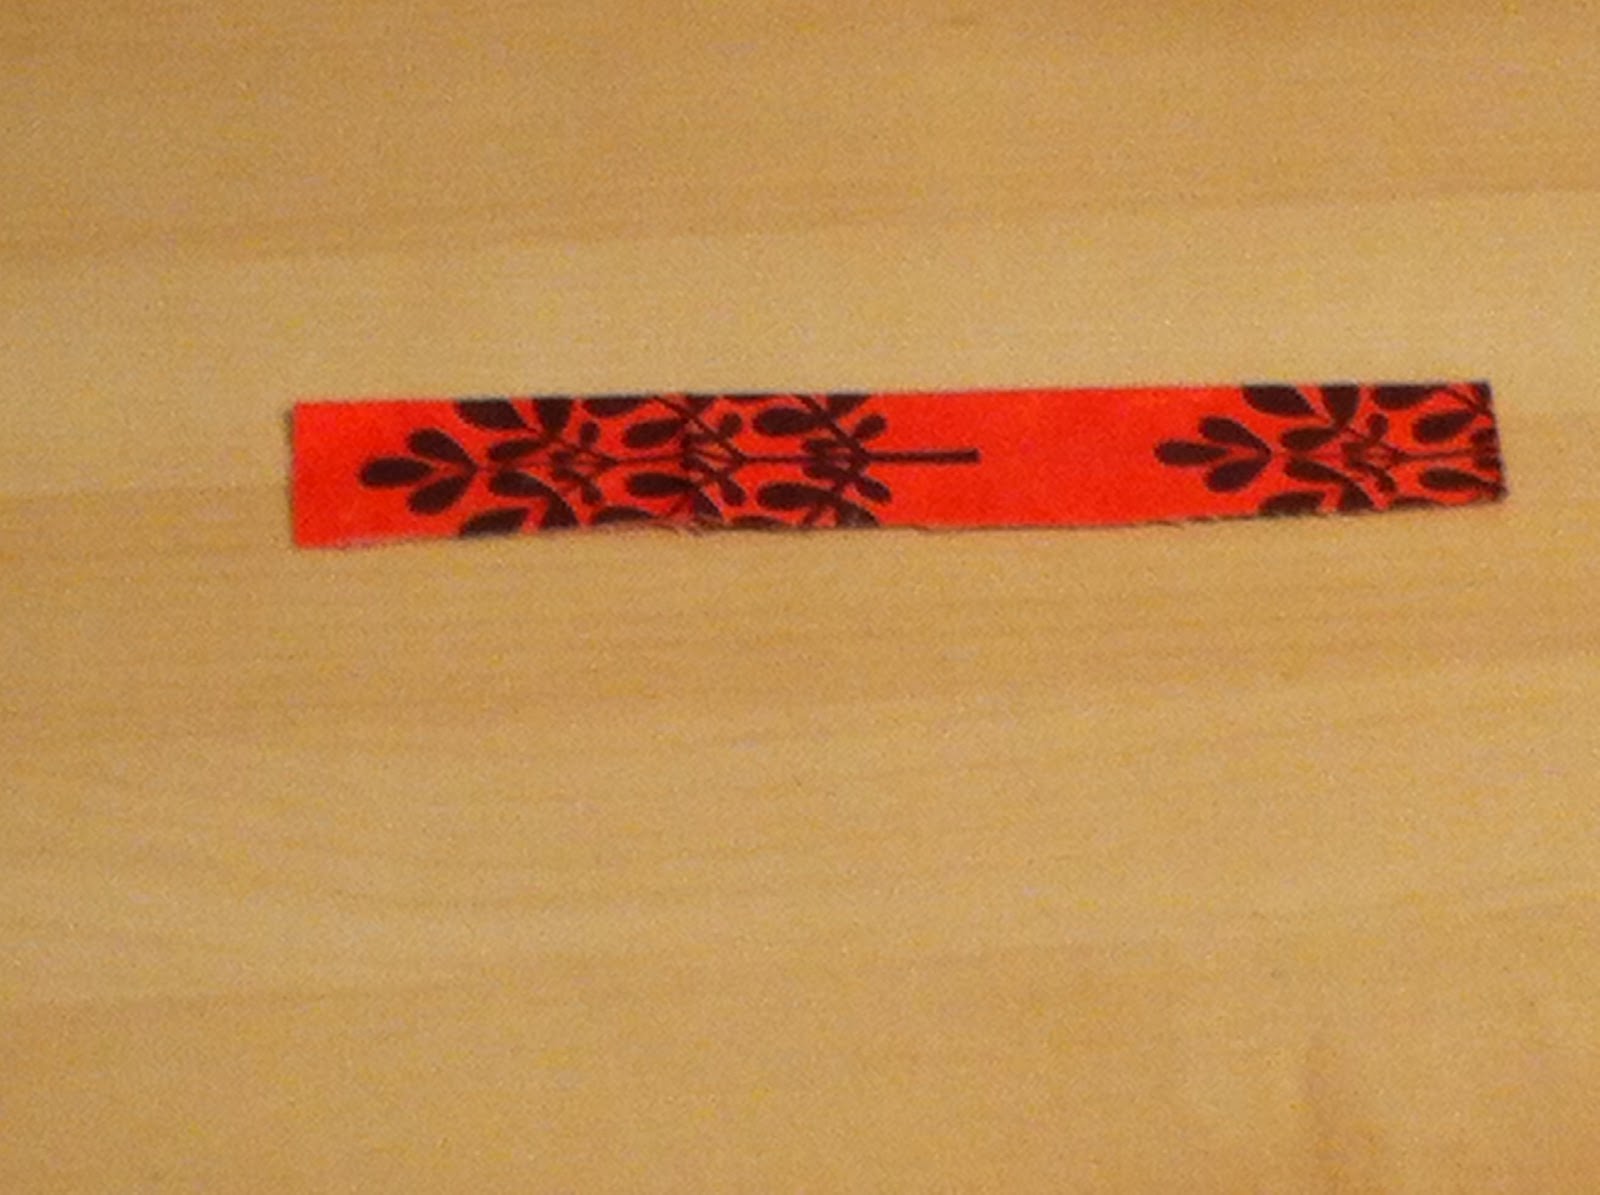
Cut a strip of fabric twice as wide as you want the finished fastener to be
Cut a length of wire slightly shorter than the fabric
Apply glue to the wrong side of the fabric, place wire inside, and fold over and seal
Try and make sure the wire is down the middle of the finished fastener
Once the glue has dried trim off any excess fabric or use pinking shears to make a prettier edge
Friday, 9 March 2012
Animal quilt
I finally managed to get a photo of the quilt i made for my wonderful little niece Chloe's first Christmas. I bought the animal fabric and the sandwiched very fat quilting wadding between it and the stripey backing. I then sewed round each animal so each one was all fat and cuddly. I sewed the edging on and it was done. It was a bit of a labour of love as my sewing machine would not cooperate! But i was so pleased with how it turned out, i think it might have even be the inspiration for starting this blog...
Wednesday, 29 February 2012
Cami bands - continued...
So i posted my first attempt at a cami band here a while ago and ive made a new modified version
Its still based on the fab tutorial over at makeit-loveit, but ive modified it so its more suitable for a non pregnant lady!
So i made a cami band following the tutorial at makeit-loveit. I made it much longer and bit tighter than my previous attempt and used jersey instead of shiny lycra. This was all in the hope it would stay put more and ride up less.

I used some khaki jersey that i bought from ebay.
Then i created some darts around the top and pinned them in place. These are just little folds or pleats in the fabric that just decrease the circumference of the band at the top where your waist is.

Lots of smaller pleats are better than a few large ones and try and space them evenly.
I only needed 4 on this cami band as i made it deliberately tight across my hips but another one i made needed 10.
I then stitched lengthways down the dart/pleat, about a third of the way down the band and repeated that for the rest of them

And voila - a tailored cami band :) i call it cami band 2.0
I wore it today and it was very comfortable, definitely and improvement on the original version.
Its still based on the fab tutorial over at makeit-loveit, but ive modified it so its more suitable for a non pregnant lady!
So i made a cami band following the tutorial at makeit-loveit. I made it much longer and bit tighter than my previous attempt and used jersey instead of shiny lycra. This was all in the hope it would stay put more and ride up less.
I used some khaki jersey that i bought from ebay.
Then i created some darts around the top and pinned them in place. These are just little folds or pleats in the fabric that just decrease the circumference of the band at the top where your waist is.
Lots of smaller pleats are better than a few large ones and try and space them evenly.
I only needed 4 on this cami band as i made it deliberately tight across my hips but another one i made needed 10.
I then stitched lengthways down the dart/pleat, about a third of the way down the band and repeated that for the rest of them
And voila - a tailored cami band :) i call it cami band 2.0
I wore it today and it was very comfortable, definitely and improvement on the original version.
Wednesday, 15 February 2012
Screen Print Cushion Tutorial
I blogged about this tutorial for screen printing without a screen over at The Creativity Exchange before and lovely BM and i needed some new cushion covers so i had a go at making them this weekend
I just used some basic cream drill cotton i bought from ebay. Id recommend a good thick fabric for cushions, like a drill, as it needs to be quite durable. I measured around my cushion, and cut my fabric to the same width and 2.5 times the length, with an additional 5-10cm seam allowance.
Then i laid out the pattern i wanted in tape in the centre of my fabric, trying to make it as symmetrical as possible. This was the most difficult part, i love the geometric shapes and they only work if theyre exact so there was a lot of measuring and calculating involved, but i quite enjoyed it really. I used frog tape, just got it from B&Q, as i think it's much better for stopping paint bleeding under the tape.
I bought some screen print paint from my local art shop. Its important the you use paint that doesnt bleed or you wont get the crisp straight line that looks so good so I tested my paint on a bit of scrap fabric first to make doubly sure.
Then i just painted in the areas i wanted, i did 2 coats to make sure i got even coverage, letting it dry fully in between coats.
Then the fun bit is pulling off the tape and seeing what youve created! I loved how mine turned out and the colour is nice and opaque which is what i wanted.
I ironed the cushion covers to set the paint, but check your paint to see what you need to do to set it. Then i made then up into cushions following the instructions on The Creativity Exchange's tutorial.
There's already in use on our sofa and I'm loving them. I'm not sure how washable they are so i just need to try and keep Marley cat and his giant muddy paws away from them!
I just used some basic cream drill cotton i bought from ebay. Id recommend a good thick fabric for cushions, like a drill, as it needs to be quite durable. I measured around my cushion, and cut my fabric to the same width and 2.5 times the length, with an additional 5-10cm seam allowance.
Then i laid out the pattern i wanted in tape in the centre of my fabric, trying to make it as symmetrical as possible. This was the most difficult part, i love the geometric shapes and they only work if theyre exact so there was a lot of measuring and calculating involved, but i quite enjoyed it really. I used frog tape, just got it from B&Q, as i think it's much better for stopping paint bleeding under the tape.
I bought some screen print paint from my local art shop. Its important the you use paint that doesnt bleed or you wont get the crisp straight line that looks so good so I tested my paint on a bit of scrap fabric first to make doubly sure.
Then i just painted in the areas i wanted, i did 2 coats to make sure i got even coverage, letting it dry fully in between coats.
Then the fun bit is pulling off the tape and seeing what youve created! I loved how mine turned out and the colour is nice and opaque which is what i wanted.
I ironed the cushion covers to set the paint, but check your paint to see what you need to do to set it. Then i made then up into cushions following the instructions on The Creativity Exchange's tutorial.
There's already in use on our sofa and I'm loving them. I'm not sure how washable they are so i just need to try and keep Marley cat and his giant muddy paws away from them!
Labels:
cotton,
cushions,
drill,
fabric,
frog tape,
geometric,
instructions,
paint,
pattern,
screen print,
seam,
sewing,
tape,
tutorial
Tuesday, 14 February 2012
Hand warmers
As its been so ridiculously cold here in the UK i thought id give V & Co's rice hand warmer tutorial a go. They were so easy to make and its a brilliant stash buster as they can be whatever size you want according to what fabric scraps you have left. I used them this morning and they were fab. They'd be great if you have any aches and pains as well or use them to warm up your bed instead of a hot water bottle! I think i might add some lavendar or thyme to them next time so they smell good aswell.
Tuesday, 31 January 2012
Flying birds quilt
I have fallen in love with this quilt! Hopefully i'll get to make it one day but i might need to save up for the volume of fabric a large bedspread sized one would require! Purlbee really does have the most amazing pattern and tutorials. I love the flying bird/triangle pattern and how the direction of the birds and the fabrics are abit mismatched in places. I love the colour scheme too - definitely one to add to the wish list!
Monday, 30 January 2012
Cami band - made!
I got round to making my cami band this weekend. I made it with stretch black lycra following the instructions at makeit-loveit. I am pleased with how it turned out (sorry for the terrible photos, it looks nicer in reality) but i'll definitely make some changes on the next one. I wont use the shiny black lycra again, its too slippy and the band tended to rise up while i was wearing it today, and i think i'll make it longer too. As you can see from the picture i wore it with a particularly short tshirt and i was a bit self conscious all day of the tshirt rising up and exposing the band (and my tum!). Also i think i might try and taper it round my waist a bit more, it fit perfectly round my hips but was a bit loose round my waist, which also made me a bit self-conscious, that maybe you could see the layer of fabric beneath the tshirt. But even with all those negatives i still really like the effect and ive ordered some stretch jersey cotton to try out for the next ones :)
See the mark 2 version here
Subscribe to:
Posts (Atom)